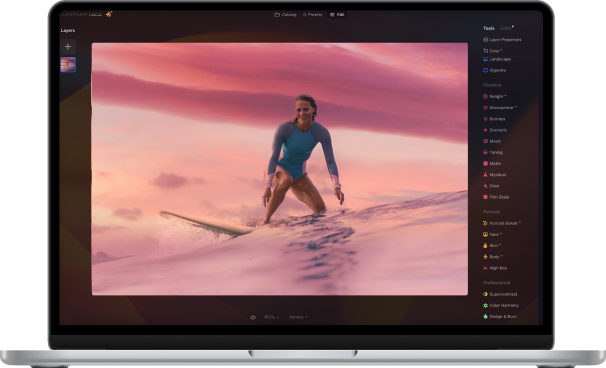
We have spent several lessons getting you up to speed and comfortable with all the magical capabilities of Aurora, including how to take HDR exposures, when to take them, where to take them and of course how to creatively edit them. Now, we add a new lesson about further customizing the image to make it uniquely yours.
Today we are going to start working with textures. First, we will demonstrate how to add a texture to your HDR image in Aurora and then how to further enhance and customize them to craft something to your particular vision. It’s going to be fun.
The first question you may ask is “What is a texture”? That’s a fair question, so let’s get that one out of the way. In photography, a texture is another image that you lay on top of your base photo and blend it into the base photo to customize and create your own end result.
It often appears to give your base photo some additional “texture”. In many cases, these “texture” images may be actual photos of textured items: concrete, wood, brick, crumpled paper, bubbles, water, clouds - you name it. They generally have some type of pattern to them.
Generally, it’s a photo of a “thing” that can be blended into your base image to give it a unique flavor. It adds some grain or “texture” to the photo, and can have the intended effect of causing your photo to look old/vintage or some other desired outcome. Many textures are used for artistic flair, to liven up an otherwise less interesting photo, or just to express a creative vision.
But as you will see in this lesson, it doesn’t have to be just something basic like a brick wall - it can also be another photograph of something entirely different that you add selectively into parts of your final image. Maybe you blend in another sky or something like that. Technically, any photo you have previously taken is possibly a texture for you. The options here are just limited by your imagination. The sky is the limit!
The other thing to know is that you can alter the intensity of the textured image by changing the opacity and the blend mode. We’ll get into that too in a moment.
Let’s get started!
Blend Modes Explained
Before we get into the processing tips, let’s discuss blend modes for a moment. With each layer you create in Aurora, you have the option to change the blend mode. That option is in the drop-down menu right above where each layer sits (upper-right hand panel). You simply click on the drop-down menu and then click on your selection. It is then blended based upon that choice.
Thus far in these tutorials, we have left it in Normal blend mode because we have been using Presets for layers, generally speaking, and the Normal (or default) blend mode approach is to hide the lower layer under whatever is present in the top layer. But with textures it’s worth taking some time and experimenting with blend modes because we are now trying to more fully blend the two images, instead of just laying one on top of the other.
There are 8 options in Aurora for blend mode. Let’s explain them quickly:
- Normal: blend modes will display your image exactly as shot
- Soft Light: blend mode is a softer version of Hard Light
- Screen: inverts both layers, multiplies them and inverts that result
- Multiply: Simply multiplies each component in the two layers
- Overlay: combines Multiply and Screen blend modes where light becomes lighter and vice versa
- Hard Light: combines Multiply and Screen modes with the bottom and top images & behavior swapped
- Color (Or Color Burn): darkens the top layer, increasing the contrast to reflect the colors of the bottom layer
- Luminosity: preserves the hue and chroma of the bottom layer while adopting the luma of the top layer
Depending on the color and type of texture file you use, and the colors of the image layer below it, the blend modes will have very different effects. The key here is to mix and match them to see what you get. We can talk about it all day, but the best way to find something you like is to experiment with the various blend modes.
Using a texture in Aurora HDR 2017
This is where the fun begins! First, you create your base HDR masterpiece in Aurora (of course, you can also use a single exposure as your base image if you would like to - it doesn’t matter in terms of using a texture). Once you have the photo looking the way you want it to look, it’s time to experiment with adding a texture to it.
We are starting with this base image that was previously created in Aurora HDR 2017. It is a dirt road out in New Mexico, way out in the country. It was a rough and dusty scene, and we are going to accentuate those characteristics in the final photo. We are also going to do a little color adjustment by using textures.
First, add a new layer just as you have done in previous lessons, by clicking on the “+” sign in the Layers section, and give this layer a name you will remember (texture is an easy one). This helps you keep track of which layers correspond to whichever changes and presets you may have applied to them. Sometimes you may want to go back and make an adjustment to one part of a photo, and being able to quickly determine which layer it is on is super helpful.
Once this layer is created, you need to go get your texture file and bring it into Aurora. All you have to do is right click on the layer, or use the drop-down menu just above this layer, and select Source Image > Custom Texture.
This will open up your finder window on your desktop and you can go locate the file that you want to use as your texture (you should have it on your desktop or in a desktop folder prior to needing it).
Once you select that file, it will import into Aurora and it will lay on top of your photo. This means you cannot see your base photo because this texture file is on top of it and the opacity defaults to 100%. As you can see, we chose a rusty texture which will give the photo a little bit of a rough feeling, which we think compliments it well.
But that’s ok, because if you remember from up above, we talked about blend modes. This is when that part comes into play. When it comes into Aurora, it will default to the Normal blend mode at 100% opacity. Here is where experimentation comes into play. It’s recommended that you try out various blend modes (you just click on the drop-down menu and select a different blend mode) and also try out different opacity settings.
Here are screenshots of ALL the blend modes for this texture, so that you can get an idea how they will appear when applied to a photo. Note that these are all at 100% opacity, but of course you can adjust that to your liking (and also note that Normal blend mode was used in the photo above, so we will not repeat that here).
But what if you only like the texture for a portion of the photo? By default, the texture will lay across your entire image, but that is easy to correct. All you have to do is use the brush and just paint in the texture to the places where you want it to be visible. In the below example, we used the Normal blend mode, and then painted it into just the sky.
The foreground already had a lot of detail, and the texture was somewhat lost in it. So we decided just to display the texture in the sky. Here’s what the mask looks like at 36% opacity (we chose that percentage because it doesn’t overwhelm the image like it would at 100%):
And here is the full view of the photo with the texture applied only across the sky:
So that’s how you add a texture (and selectively apply it, if desired). It’s quick and easy and very straightforward.
But now we are going to experiment a little and add a 2nd texture on top of the image to give it some additional punch. While this may not be an everyday thing, it can create a compelling image, and it’s certainly fun to experiment with.
If you do this, it’s recommended that you use two different types of textures (for example, one old paper and one abstract). The reason is that if you use two similar textures, they will possibly end up having about the same impact on the photo but it will be twice as prevalent. It’s more likely to benefit the photo if your two textures are completely different in style.
Once the second texture is applied (same steps as above: add a layer, select Source Image > Custom Texture, and choose your file), we can adjust the blend mode (remember, the texture will default to Normal blend at 100% opacity). These adjustments will give the photo a completely new look and feel. The best way to arrive at your final creation is a lot of experimentation because each texture and the overlay method chosen for it will impact the end result in various ways.
In this case, we chose a colorful abstract texture, because we want to accentuate the sort of red color across the image, but again we are going to do this selectively. Also, we chose the Hard Light blend method this time.
First, here is the texture once it is brought into Aurora and laid on top of our current creation:
Here is what the second texture looks like once we convert the layer to the Hard Light blend mode but leave it at 100% opacity:
Next, we are going to mask it into the sky at 100% opacity, but into the foreground at only 30% opacity. We want some of the color in the foreground, but not as much as in the sky, so we just use the brush at different opacity levels in the two different sections of the image. The mask will look like this:
And your image will look like this when you do the above steps:
Here is the original image we started with:
And here is the image after we added two different textures with different blend modes and some custom brush work:
But wait, there’s more! :-)
Did you know that instead of a texture, you can add a new sky? You sure can! In fact, it’s really easy to do. You see, a new sky is just another “texture”, and you can paint it in just to the sky the same way you did with the texture files.
We will go back to the original base image that we started with, which is here:
Now add a new layer just like before, but this time, when you go to choose your texture file, just choose a new sky photo instead of a texture. Here is the one that we chose, overlaid on top of the base image:
Then, we use the Normal blend mode and a brush to paint it into the sky only. This does require some precise brush work so that it blends well, but it is still a fairly easy thing to do. This results in a mask that looks like this:
Then, we decided to make some temperature and tint changes to the foreground so that they would be a better match with the colors of the sky. We did that back on the base layer in the Color Menu. We also slightly brightened the foreground using the Top & Bottom Lighting slider on the base image.
Here is your final photo with a brand new sunset sky added (first the screenshot from Aurora, and then the actual photo:
There really is no limit to what you can do with textures in Aurora. Experiment, have fun and get creative!
Here are a few more example photos that have a textured added to them.
Your 8th photo assignment
Use Skylum (or personal) textures to create a unique overlay and show us your before & after images!
If you don’t have any texture files of your own just yet, don’t worry because we’ve got a bunch to get you started available at http://aurorahdr.com/free-stuff. After you’ve played with some of ours and created something cool with your HDR images, we want you to go out and find some cool places to create texture files of your own. Remember they can be anything: wood, paper, cement ceilings, floors, drywall, and even the pavement under your feet.
Be sure to share them with us on our Facebook group and tag your images and presets with #aurorahdrlessons.
Missed the previous lesson?
Check out the link below:
Lesson 1: The basics of HDR Photography
Lesson 2: Merge the brackets
Lesson 3: Tripods vs Handheld
Lesson 4: Exposure for HDR
Lesson 5: Aurora HDR Presets
Lesson 6: Perfect Location
Lesson 7: Custom Stylizing: B&W Photos
If you have questions, don't hesitate to email us at [email protected]


