Of all the various forms of photography, Macro Photography is one of the most famous, and there are pretty good reasons for that. Besides the fact that it’s readily available, it belongs to a very broad genre of photography.
You need not look too far away before you find hidden treasures of macro subjects hidden among insects, leaves, and flowers. It gets even more interesting if you are a nature lover.
Another fascinating thing about Macro Photography subjects is their abundance in places that could somewhat be described as non-photogenic locations, like backyards and several other places. As a Macro photographer, you are at liberty to take great images of nature, and of tiny little creatures without having to travel around.
However readily available and a relatively convenient form of photography this is, how you maintain absolute control over lighting, on shoot-subjects, remains a strong determining factor to your success in the photography field.
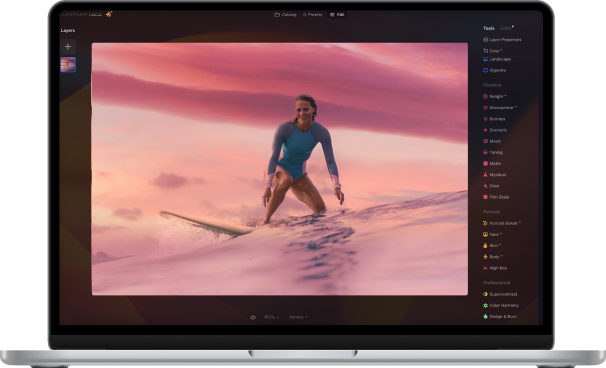
This is where you’d need Aurora HDR – a superb High Dynamic Range software by Skylum and the world’s famous HDR photographer, Trey Ratcliff. Aurora is your best bet at producing very natural and realistic Macro photos that beat the clock.
In this article, you will find some useful tips and ideas that’d significantly help you improve your Macro and general photography skills as I shed more light on the various benefits that abound when we combine in-camera techniques with HDR Macro detailed post processing.
HDR Macro Photography: Getting it Right from the Beginning
Contrary to some misconceptions about High Dynamic Range on image perfection – HDR processing technique isn’t designed to turn lamely captured exposures into a nice looking HDR. Rather, what you’d get is a lame HDR image.
In other words, as described in most of the HDR tutorials, you’ve got to, at least, get the captures right. You’d need to put some good effort into your focus, composition, and lighting, after which you can now let HDR take it from there, and transform it into an incredible masterpiece. The same applies to using HDR for Macro.
There are also folks who become skeptical at the mention of the use of HDR technique in any field of photography. However, what needs to be understood is that depending on the program you’re using, it’s quite tempting to go extreme with HDR processing.
This accounts for HDRs that have the look-alike of a computer generated an image, rather than that taken with a camera. If you are an HDR skeptic, it will interest to know that an HDR app like Aurora produces HDR images that are so cute and realistic that you’d dare to argue the fact that they were HDR-processed, making it a great alternative to other apps like Photostudio.
Since we have established the fact that the HDR technique is designed to enhance our photo’s highlight, mid-tone and shadow details, it’s, therefore, important that we have an excellent understanding of how to get every other thing in place.
Depth of Field (DOF)
The Depth of Field is one of the common problems that confronts Macro photographers. It generally follows a simple logic where most of the composition is out of focus due to the much-needed proximity between the camera lens and the subject.
The implication of this is that there tend to be so much artistic compositional limitations which often requires minuscule apertures and tilt lenses to have more precise and absolute control over the elements of the composition that we have in focus.
Another way to overcome Depth of Field is to only capture very flat images, carefully limiting the structure in such a manner that your lens’ nodal plane parallels to that of the subject. This technique is predominate in the operation of reproduction tables, flatbed scanners, and microscopes.
Get your Magnification Right
Since we know that Macro Photography is predominantly about how the subject is perceived by your camera’s sensor, it’s important that you at least have an idea of the working principle:
First, you need to understand that most DSLR camera sensors are generally 1.5 inches long. The implication of this is that an object that falls on the one-inch size of the sensor would ultimately fill most of the resulting photo. So, get your calculations right.
Next is understanding magnification ratios. It’s really straightforward; an average size projection on your sensor equals a magnification of 1:1, double the size equals 2:1, etc. An image with a magnification ratio of 1:8 and above isn’t a Macro Photo.
Choosing your Working Distance
Your ‘Working Distance’ just means the closest possible distance between your camera sensor and the subject, as tolerated by your lens’ focus. A working distance of, say, 12 inches, for example, implies that the lens of a ten inches camera/lens combo, at its closest focusing distance, would only be two inches away from the subject.
In effect, the farther away you are from your subject, the better your chances of taking angular and styled shots – the convenience of not having to scare away your subject, if it’s an insect or animal.
The higher the focal length value of your camera’s lens, the greater the possibility of a larger working distance. More so, magnification decreases with increasing working distance. Typical examples of macro lenses with wider working range or coverage are Canon 180mm f/3.5 and Nikon 200mm f/4.
Selecting the Right Camera Type
With a broad range of camera types in the market today, having a clue as to what kind of camera you should buy is as vital as pressing the shutter button. The DSLRs are great options for Macro Photography due to the wide range of Macro lens support.
You also want to select a camera with smaller pixels like Nikon D7200 due to the greater magnification it offers for more subjects, and that with a relatively lesser magnification like Nikon D810 for larger ones.
Although Canon has great cameras and lenses that can be used for stunning captures and the likes, high pixel-density Nikon DSLRs have however been found to possess more technical stability for Macro Photography.
Tidying up your Exposures in Aurora HDR
Just like an athlete isn’t through with race until s/he crosses the finish line, so also is the case with tidying up your shots. Aurora HDR’s advanced digital photography technology now makes it possible for you to selectively use only the best elements (highlight, mid-tone, and shadow) of each image in your exposures brackets, merge, and tone map them into a single image.
Whether you’re using the Focus or Exposure stacking technique for your Macro, Aurora HDR is designed to make your shots come alive in an extraordinary way!


