In this week’s lesson we’ll look at some of the more advanced and powerful features of Aurora HDR 2017.
There is just so much you can do with Aurora. It’s powerful, versatile, and fun all at the same time. You can take your HDR creations from realistic to dramatic, and everywhere in between. We’ve spent the last 8 lessons showing you how to use the product and we’ve covered all the basics features of Aurora, while also sharing thoughts on how to get the most out of HDR photography. Now we are going to discuss some of the more advanced features of Aurora, so let’s get started!
Layers
Probably the product feature that gets the most praise is the ability to work with layers. It’s an incredibly powerful and useful aspect of Aurora, and it’s certainly one of our favorite features in the application.
While this has existed in Photoshop for some time (and if you have ever used PS then you will already understand this), the fact that it is available here in this application is incredible. It’s a key differentiator from other products out there.
As you learned in a previous lesson, all you do to add a layer is hit the “+” button on the layers toolbar. That creates the layer. Then, give it a name that you will remember because it’s possible you will have multiple layers and specific names help you remember which processing steps you took on each one. From here you can add a preset or make any sort of adjustment to your photo.
Once you have a layer created, you can do some pretty wonderful and creative things with your photo. Let’s start with the most important and useful feature - masking.
Masking
Once you create the new layer, you are generally either going to apply a preset to it or make selective edits using a brush. Let’s talk about both examples.
If you apply a preset, you can either apply it to the whole photo (and adjust the opacity by moving the opacity slider for that layer, if you would like) or you can add it selectively to the photo by using the brush. The brush is available by clicking on the brush tool at the top right of the toolbar.
Once you click that, it activates the masking brush which you can use to just paint over the portions of the photo where you want the preset to be applied. This lets you target different preset looks to different sections of the photo.
Maybe you like the details from one preset, but the smooth look from another preset. You can add a layer for each and then just paint it into the photo where you want it.
The other way to use a masking brush is to selectively apply adjustments you made on your own, without the use of presets. For example, you might have a layer created because you want to remove noise from the sky. So on this layer, you open up the HDR DeNoise menu and move the sliders until the sky appears the way you want it to appear. But when you move sliders, it affects the entire image.
So once again, you click on the brush tool to activate the masking brush, and you just paint it into the sky. The rest of the image (sections that you have NOT painted) remain just as they were on the bottom layer. It’s very straightforward.
Note that in Aurora, the masking brush defaults to 50% opacity, so you may want to adjust the brush opacity before you start brushing in your edits.
There are some additional features in the right click menu of your layers panel. These come in really handy when you are working with layers and help you quickly make working with masks even easier.
- Show Mask - this will show you the area you have been working on, and is represented by a red layer of “paint” over the image which illustrates the mask
- Invert Mask - this inverts your mask, basically creating a mask completely opposite to what you have done - this is very helpful when you want one type of edit to part of the photo, and a completely different type of edit to the exact opposite parts of the photo
- Create Luminosity Mask - this makes a mask based on the brightest areas of the image so you can quickly apply adjustments to the brightest parts of your image
- Copy / Paste mask - quickly copy a mask from one layer and apply it to another layer - very helpful when you have multiple edits for the same parts of a photo - therefore you do not have to create a mask each time
- Clear Mask - this removes all work on the current layer and allows you to restart at the beginning
- Fill Mask - this fills the mask with 100% opacity
Gradient Filter
To access the Gradient Filter, first you must be in Brush Mode (click on the brush icon above the histogram). While in brush mode, you can locate the Gradient Filter just to the right of where you select either the Brush or the Eraser - it’s the little rectangle icon. Click that and the gradient filter will appear on your image.
Once the gradient filter is on top of your image, you can move it around to accomplish all sorts of edits. Note that it will appear in the middle of your image with 3 lines, or bands, across it and a number in the middle.
If you click on the number and hold it, you can move the filter up and down your image. If you hover over that center line, a rounded arrow will appear. This allows you to adjust the angle of the filter itself. Note that the number in the center of the filter will move accordingly, because this number represents the measure of the angle. The default setting is 180, which is straight.
You can also grab either the top or bottom line and move them up and down. This impacts the amount of the image that your desired edits will impact.
When you are at 180 (a straight line), the edits you make to the photo will appear on the image in this manner:
- Above the top line: edits will be most visible here
- Between top line and center line: edits begin to reduce in intensity
- Between center line and bottom line: edits are greatly reduced
- Below bottom line: edits are not visible here
You can also invert the line, causing the edits to appear starting from the bottom, and a 0 will display as the number in that case. Here is an example photo where we have flipped the filter, causing the edits to begin at the bottom instead of the top, gradually fading to nothing at the top. To illustrate this, we have exaggerated the colors in the bottom of the photo.
Once you are satisfied, just click Apply and the changes will be saved to that layer. This is a very powerful tool, especially in landscape photos. You can quickly adjust light levels, details, colors and more across wide sections of a photo with a gradient filter.
Luminosity Masking
Yes, you can do this, too! Aurora HDR 2017 really has everything you need to make stunning HDR photos. Luminosity masking is a very popular feature of the product. It allows you to make edits to only the brightest parts of your image. The mask can be applied automatically based on the light values in your photo.
Using luminosity masks is something nearly every landscape photographer has in their toolkit. Now that you can do that right in Aurora, you can save yourself countless time and effort by skipping Photoshop.
You create the Luminosity Mask by adding a new layer and then in the layer drop-down menu you just select Create Luminosity Mask. Aurora will create it for you automatically. You can then apply any edits specifically to the light areas of your image, or if necessary, invert the mask and apply it only to the dark areas of the photo.
In the below photo, a luminosity mask was created and we applied noise reduction and color adjustments to the mask. The noise was primarily in the sky and water - the most luminous parts of the image - so using a luminosity mask was a quick way to make these edits. This took just a couple of minutes, and here is the result.
Essentially what luminosity masks do is an advanced selection based on light values. This helps overcome any shortcomings in the tonal values that were captured by your camera. You create the mask and then your edits are selectively applied to the image. It’s another unique way to control your creative vision for a photo.
Blend Modes
In addition to all the tools we’ve discussed for making edits to your photos, you can further creatively adjust it using blend mode adjustments. These are the same blend modes we discussed in Lesson 8 for Textures, although here we are talking about applying them to whichever layers you may have added to the base photo. Your options are as follows:
- Normal: displays your image exactly as shot
- Overlay: combines Multiply and Screen blend modes, light becomes lighter and vice versa
- Hard Light: combines Multiply and Screen blend modes
- Soft Light: blend mode is a softer version of Hard Light
- Screen: inverts both layers, multiplies them and inverts the result
- Multiply: simply multiplies each component in the two layers
- Color: divides the inverted bottom layer by the top layer, and then inverts the results
- Luminosity: preserves the hue and chroma of the bottom layer
As with many of the tools in Aurora HDR 2017, it’s recommended that you experiment with them to get familiar with how they impact your photos. Especially with blend modes it’s great to try them out on various images so you get a good sense of what results they will generally produce for you.
Cropping
Did you know you can straighten, crop and resize in Aurora too? Yes, the list of things Aurora can do for you just keeps getting longer and longer, doesn’t it? To get into the Crop Tool just click on the little icon of a pair of scissors, which is located above the histogram on the upper right side of your screen. Note that this feature is only available in the standalone version. If you use a host program such as Lightroom, Aurora will default to letting you perform these actions in that program.
You can crop based on some pre-defined ratios (square, 3:2, 4:3, freeform, etc) with a single click. You can resize based on pixel dimensions. You can drag a slider to straighten the photo if needed. It’s all there, folks!
Clipping
On the Histogram display, you can enable light and dark clipping. This will display areas of the photo in which there is no detail available. For example, blown out highlights will appear red and extremely dark areas will appear blue. This is a great visual guide to let you know which areas have lost detail and may be unusable, and it’s also very handy in letting you know if you have pushed your edits too far in certain areas
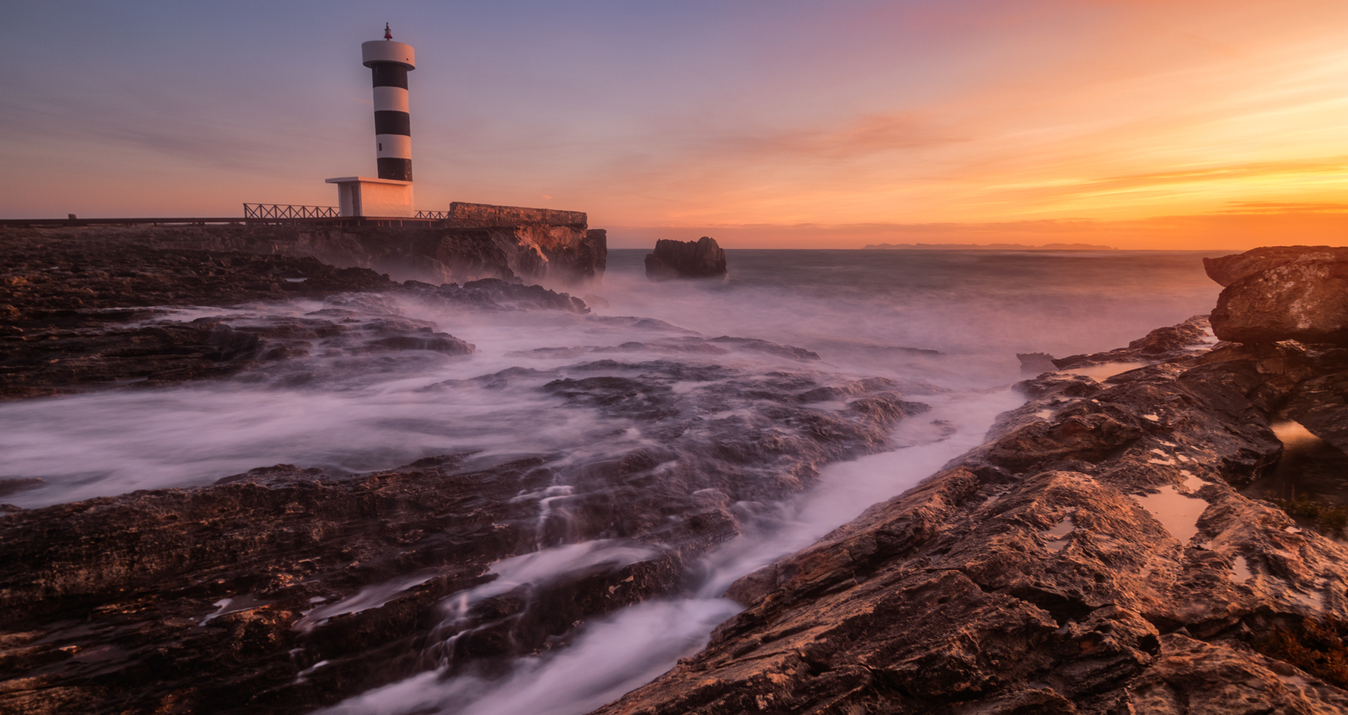
To activate this, just click on the tiny triangles in the upper left and right corners of the histogram. Here is a sunset photo that illustrates how it will appear on your photo. See the parts of the photo that are blue and red?
As you can see, the list of amazing things you can do with Aurora is incredibly long. There’s really so much capability in this application that you can use it again and again, and keep finding new tools to employ in your editing. But are there any negatives to Aurora? Well, to be fair, there is one. Each time you add a layer, your final image size will grow. So perhaps you should purchase some additional storage. :-)
Show us your original files along side of your newly edited creations in our Facebook group and tag your images and presets with #aurorahdrlessons
Missed the previous lesson?
Check out the link below:
Lesson 1: The basics of HDR Photography
Lesson 2: Merge the brackets
Lesson 3: Tripods vs Handheld
Lesson 4: Exposure for HDR
Lesson 5: Aurora HDR Presets
Lesson 6: Perfect Location
Lesson 7: Custom Stylizing: B&W Photos
Lesson 8: Custom Stylizing: HDR Textures
If you have questions, don't hesitate to email us at [email protected]