In this lesson you'll read how to create, use, and modify powerful presets in Aurora HDR 2017 in no time.
If you’re new to Macphun’s line-up of incredible photo editing tools, then you might not be aware of how many presets that come pre-loaded, or how powerful they can be! A preset is essentially a "button" in the software that contains a set of editing instructions made up from one or more of the editing controls found in the software.
The cool thing is that with one simple click, you can apply *all* of those editing instructions to your photo. Instantly, your photo has a new look, and all you did was hit a single button. Call it the easy button.
This can give you a finished photo in a single click, although it’s recommended that you also doing some additional customization after the Preset is applied, in order to further control the final look of your photo (unless you are happy with it of course).
That’s the power of Aurora HDR 2017 - use a Preset to get you started, and then apply effects selectively with layers and brushes. It’s very quick and easy, yet incredibly powerful. Presets are also handy for repeating the same look across many photos. This way you don’t have to try and remember what you did to a photo each time. You just click a button and there you are!
As with several of the other apps found in the Creative Kit, Aurora HDR 2017 comes with many pre-installed (and insanely powerful) presets which are perfect starting points to any photo edit. Scroll through them for inspiration, or explore various looks with a quick preview. These can save time and get your creative juices flowing, plus new presets are added all the time!
But here’s another great feature - you can create your own Presets to use again and again, or to share with your friends. That’s right, just save your own Presets in Aurora HDR for the next time you are editing. So if you have a “custom look” that you like to create again and again, you can make a preset for it to save you the time of retracing your steps. Just a single click and there you are!
In this lesson, we’re going to show you how to use, modify, create, save, export and import presets to help you create your finest masterpieces!
Once you’ve opened an image in Aurora HDR 2017, you can locate any installed presets on the bottom right side of your screen. Just click the teal button labeled “PRESETS”.
The below images show some of the presets in the Realistic category.
When clicked, a film strip will open on the bottom of Aurora HDR 2017 displaying the presets that are in the current/last used category. When you select the dropdown menu, you’ll be presented with a list of several options (which varies depending on whether you have the Basic or Pro version of Aurora) to choose from:
- Basic - these presets are suitable for almost any image, with effects ranging from realistic to heavily detailed
- Realistic - for a more realistic presentation, with effects from balanced to bright, detailed to dreamy
- Dramatic - presets for stylized photos, ranging from desaturated and moody to highly colorful and dramatic
- Landscape - ideal for nature and landscapes, these offer looks from realistic and bright on to highly detailed
- Indoor - designed to optimize interiors and real estate photos, these offer great clarity and balanced light
- Architecture - fine tuned for cityscapes, buildings, bridges, and more urban locations, these presets offer compelling options ranging from dramatic and detailed to bright and balanced, and even a little grungy
- Trey’s presets – available in the Pro version, which offer several dynamic and creative interpretations
- Favorites - a listing of presets that are "favorited" by you; this is a quick way to keep your preferred presets together in one folder instead of having to search across multiple categories for them each time you edit
- User - listing of user-created presets
- All - includes all the presets in alphabetical order; perfect for browsing!
- Get More Presets - a free downloadable bonus pack of presets
When you begin using Aurora HDR 2017, you’ll notice that the Favorites and User sections are empty, but don’t worry! This is easy to fix. The more you use the presets, the more you will find the ones you like and use the most. You will start to develop preferences, and it’s likely you will use them again and again. You’ll find the ones that just fit best with your style and creative vision. They will become Favorites.
To add them to the Favorites category, simply click on the "star" icon in the top right corner of each preset thumbnail (when viewed in the filmstrip). This will turn it yellow, and add it to your Favorites category. When you go back to the preset category menu, and click on Favorites, you will see it there. Note that it did not move out of the original category - it’s simply duplicated and found in Favorites as well as the original category. Clicking on the star again will remove it from the Favorites, but of course not delete the preset itself - it will remain in it's "home" category as well as the All category.
We highly recommend that you spend some time trying out different presets. While all of them may not appeal to your tastes, there is plenty of variety and you are likely to find many that you like. You will probably also find things that you didn’t expect to like, but like anyway. You may even find presets that send you off in new creative directions. Click on different categories and see what they offer - and try them out on different images, too. It’s amazing how different the same preset looks on two different photos.
This is also a great way to explore your creative vision for a photo. You may find something completely different and new, that you never would have thought to try. Perhaps you will be led to create a dreamy, moody landscape or cityscape. The options really are limitless, and experimenting with various presets is the best way to get inspired. A single click is all it takes to get started, and you may find yourself on an entirely new creative path with an image - it’s fun, exciting and even educational!
Check out a few examples from the Dramatic preset category below.
Customization
As mentioned previously, presets are made from the existing controls in the software. While a preset can be a great starting point, it is often just that - a starting point. Many professionals use presets to begin their editing in Aurora HDR 2017, but then go in and customize the image further. The preset that is chosen sets you off on a creative journey, and then you can fine-tune things as you go, fulfilling your vision for a photo.
It’s a fun trip to take!
After you choose a preset and click on it in the filmstrip, it will apply automatically to the image. One great thing about these filmstrip previews is that there is an opacity slider built into the small preview window. Perhaps you like a certain preset, but feel it’s a little too strong for your tastes. This is where the opacity slider comes into play.
With the preset selected and the filmstrip still visible, hover your mouse over the preview in the filmstrip and you will see a slider there. The preset is automatically applied to the image at 100%, but with the opacity slider you can reduce that just by dragging it to the left. This is a great way to try out different gradations or intensities of the preset. Reducing the opacity (by dragging it to the left) reduces the amount of the preset. As you drag the slider, it is adjusted in real time in the large image on your screen.
Many photographers will adjust the opacity each time they apply a preset. It gives them more visual information that they use to finalize the edits for a photo. It’s all part of the fun of experimentation.
Here is the Late Fall preset in the Dramatic category applied to the image, but if you notice in the filmstrip, the opacity slider has been moved to the left, thereby reducing the intensity of the effect across the image.
Once you have decided on a preset, just click the teal-colored Preset button again and the filmstrip will drop out of sight, giving your image more screen space. Now it’s time to fine-tune your preset.
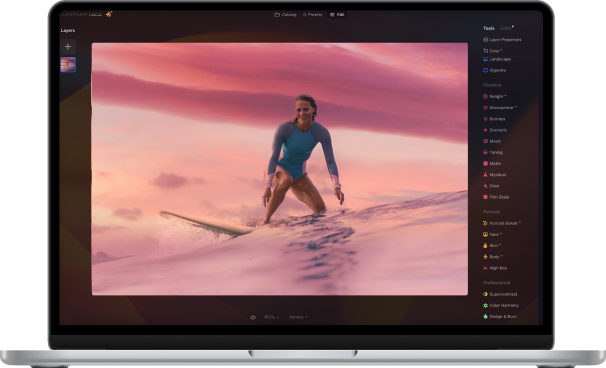
You'll notice the adjustment panel on the right sidebar. This is where all the image controls live, and as you can see they are arranged by category. Any control that was used to make up your chosen preset is highlighted in gold; any control that wasn't used will remain in white.
This allows you to (a) learn how the preset was made by clicking on that control and viewing the settings, and (b) modify each control to better suit your taste and vision for the image.
To modify a control, just click on that section and the drop down menu will appear. You will see what has already been applied to your image. You can customize by moving the sliders left or right to reduce or increase the effects. Also note that there is an orange button highlighted by each control category. If you click that, it will turn that control off for the current image.
This way you can compare before and after effects with each control. Click it again to turn it back on. The other thing you will notice is a pair of arrows in a circular pattern. That is the reset button for that control, which means that if you click it, any adjustments on that control menu will reset to zero.
Now it’s time to practice, experiment, and learn. Practice modifying settings in the various tool menus in the right-hand panel. Open up Tone, Structure, Color and more and just move things around to get familiar with the effect that each has on your image. Experimentation is the best way to learn these things.
See below for examples of various presets that have been customized.
Saving your own presets is surprisingly easy! When you’re finished making adjustments to your photo, save those settings as a preset by clicking the “+” button next to the teal-colored Presets button. Choose a name for your preset that you will remember and click on the blue "Create New Preset" button.
Your new custom preset will now show up in the User Presets category.If you hover your mouse over any of the custom presets and right-click (Cntrl-click), a pop-up menu will appear with additional features, including exporting your preset to share with others:
- Show in Finder - opens Finder and displays the location of the currently selected preset file
- Delete - deletes the current user preset
- Rename - renames the current preset
- Export - saves the current preset file in a different place that you select
- Update with Current Settings - rewrites the preset using the current state of the sliders; handy for fine-tuning a preset without having to create a new one!
To import new presets from your friends (or share your own), open the Presets folder by using the "Show in Finder" option in the File menu. In the Finder, copy/paste the presets to this location. If you added a new preset, it will automatically be added to your User Presets category.
Don’t forget to show us what you’ve created in the Aurora HDR facebook group!
Be sure to tag your images and presets with #aurorahdrlessons
Missed the previous lesson?
Check out the link below:
Lesson 1: The basics of HDR Photography
Lesson 2: Merge the brackets
Lesson 3: Tripods vs Handheld
Lesson 4: Aurora HDR Presets
If you have questions, don't hesitate to email us at [email protected]


